HTTP/s Listener
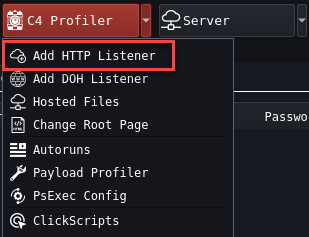
An HTTP or HTTPs listener can be made by navigating to C4 Profiler >> Add HTTP Listener
Configuration
- Listener name: This is the name of your listener e.g.,
- Client_XYZ_HTTPS
- Listener Bind Host: This can be the localhost, the internal cloud IP from a cloud provider, or the external IP Address of your cloud droplet. This will be populated automagically
- Rotational Hosts: This will rotate between which callback hosts will be used. For instance, if you have multiple CDN’s pointing to a domain and want all of them to call back to this one Team Server
- Port: Listening Port to recieve callbacks. Generally 443 and 8443 are good choices for HTTPS and 80 or 8080 for HTTP
- User Agent: The user agent to Mimic for C2 callbacks. E.g., Google Chrome, MSEdge, Mobile Device
- Header: Set of headers to send along with the Web Requests
- Malleable Post Data: Post Data sent to the Team Server, can be useful for blending in and evading
- URI’s: Comma separated list of Uniform Resource Identifiers used during Badger check ins. These will be randomly used during check ins
- OS: Operating System, Only Windows OS is operated at the time of this writing
- SSL: Choose whether or not to communicate over TLS/SSL (HTTP Listeners are still encrypted)
- Proxy: Route Badger traffic through a Proxy
- Sleep Obfuscation: Choose which method of obfuscation to use for shellcode. This can be changed later
- Default Sleep: Choose Sleep/Jitter/Stasis (The amount of time and variation of delay between Badger Agents checking in)
- Common Auth: All Badger Agents will have the same authentication key
- One Time Auth: Only allow one execution and authentication per key generated. This is useful in cases of initial access. For example, choose one key per user phished to allow execution.
- Create Random Set of Authentication Keys: Have Brute Ratel create your authentication keys, randomly
- Die if C2 is unaccessible: If Badger agent can not connect to a rotational host, have the badger terminate it’s own callbacks

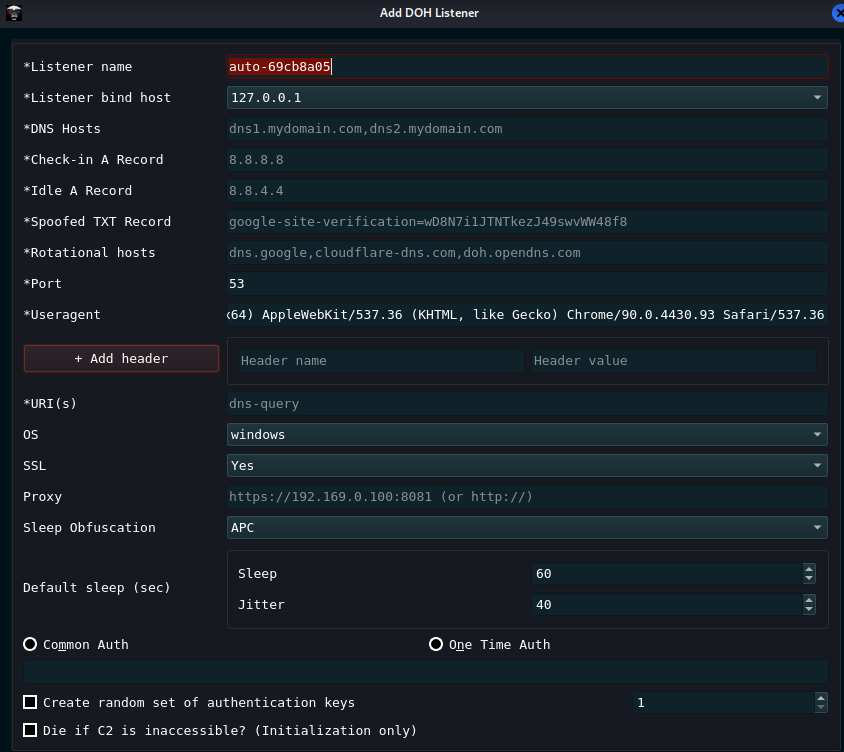
DNS Over HTTPS (DOH)
- Listener name: This is the name of your listener e.g.,
- Client_XYZ_DoH
- Listener Bind Host: This can be the localhost, the internal cloud IP from a cloud provider, or the external IP Address of your cloud droplet. This will be populated automagically
- DNS Hosts: These will be the callback hosts you make for your attacker domain. e.g., dns1.evildomain.com, dns2.evildomain.com
- Check-in A Record: When a DNS record is recieved for instance, sending a command in a Badger agent, this will check in and send the information back to the operator in a TXT Record
- Idle A Record: If no record is recieved due to no commands ran by the operator, this will sleep in a loop until a command is issued.
- Spoofed TXT Record: This will be the name of your TXT Record sent back upon command execution. Can be useful for blending in. Google DNS TXT Records may look like google-site-verification=qwertyuiop123456789
- Rotational Hosts: This is where the actual payload will connect back. e.g., dns.google.com
- Port: Port 53, for DNS
- User Agent: The user agent to Mimic for C2 callbacks. E.g., Google Chrome, MSEdge, Mobile Device
- Add Header:
- Important!
- Header Name = Content-Type
- Header Value = application/dns-message
- URI:
- Important!
- dns-query for Google DNS, check respective DNS provider URI - e.g., CloudFlare
- OS: Operating System, Only Windows OS is operated at the time of this writing
- SSL: Choose whether or not to communicate over TLS/SSL (HTTP and DoH Listeners are still encrypted)
- Proxy: Route Badger traffic through a Proxy
- Sleep Obfuscation: Choose which method of obfuscation to use for shellcode. This can be changed later
- Default Sleep: Choose Sleep/Jitter/Stasis (The amount of time and variation of delay between Badger Agents checking in)
- Common Auth: All Badger Agents will have the same authentication key
- One Time Auth: Only allow one execution and authentication per key generated. This is useful in cases of initial access. For example, choose one key per user phished to allow execution.
- Create Random Set of Authentication Keys: Have Brute Ratel create your authentication keys, randomly
- Die if C2 is unaccessible: If Badger agent can not connect to a rotational host, have the badger terminate it’s own callbacks
SMB Beacons/P2P
![]() Important!
Important!
- In order to make an SMB Beacon (It’s different than HTTPS) you have to go to
- C4 Profiler
- Payload Profiler
- Choose “Add Profile”
- Select SMB
- Choose a Config Name e.g., Client_XYZ_SMB
- Choose a pipe name, recommended you use common named pipes. Common named pipes can be found on your own computer by typing this into a powershell prompt
[System.IO.Directory]::GetFiles("\\.\\pipe\\")
- To Properly Authenticate to the SMB Badger, you must have the same authentication key as your HTTPS, or DoH Listener. C2 Auth keys can be found in your profile and looks like this
      "My-Little-Listener": {
      "auth_count": 1,
      "auth_type": false,
      "c2_authkeys": [
      "2GGKJ5H41ED3JV7T"]