Bruno is an API platform tool used to interact with interfaces exposed by an organization. Advantages to using Bruno are that it does not require a centralized account and that all API collection details are stored on the file system of your test machine.
API platform tools are used by developers and penetration testers alike. From a testing perspective, the API platform tool is usually used to generate valid baseline requests from which the tester can deviate in an effort to elicit responses from the server that might be indicative of a vulnerability.
Core Concepts
The Bruno API platform tool has several different components that must be understood to use the tool efficiently. The following sections provide a basic understanding of those components. Full treatment of the tool can be found in the [[ https://docs.usebruno.com/introduction/getting-started|Bruno documentation]].
Preferences
Application preferences can be used to affect the way that the application operates as a whole. Bruno preferences include theme settings, font settings, documentation information, and probably the most important settings, the global proxy configuration. Bruno preferences are accessed by navigating to the Collection > Preferences menu option. This menu is different than the Settings context menu option on a given collection.
Normally, during testing, requests should be sent through an intercepting proxy like Burp Suite so that baseline transactions can be easily manipulated. One of the most important settings is on the General tab of the Bruno preferences window.
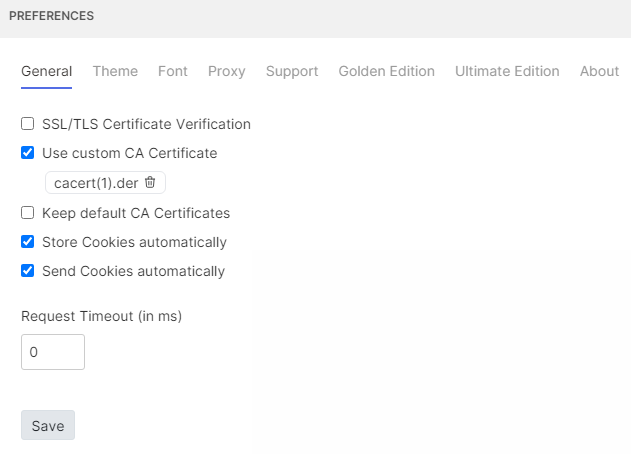
Un-checking the SSL/TLS Certificate Verification check box prevents Bruno from throwing TLS errors due to the Burp Suite CA certificate. As seen in the image above, despite importing the custom Burp Suite CA certificate, the application still generated certificate error responses. This behavior may change in the future.
The next important preference is on the Proxy tab. This controls whether Bruno globally uses an upstream proxy to access the target application. Under most circumstances, setting the global proxy is the most useful configuration.
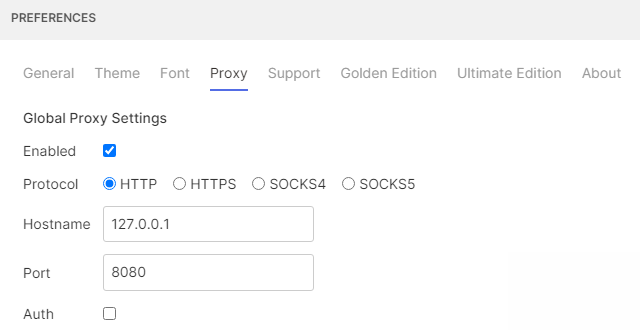
The proxy configuration can also be set or overridden at the collection level using the collection settings dialog.
Environments
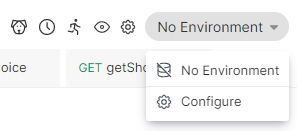
Environment settings have global scope and can be applied to multiple collections simultaneously. Configuring an environment can be useful when identifiers are used across multiple API collections. As described below, API collections are often delimited by the developer of the API and correspond to different Swagger API specification. To create an environment for testing, select the drop down menu in the upper right corner of the Bruno user interface.
A new environment can be created using the Configure menu option. After selecting Configure, you will be prompted to create or import an environment, and name the environment. Once you have completed the steps above, the following form will appear.
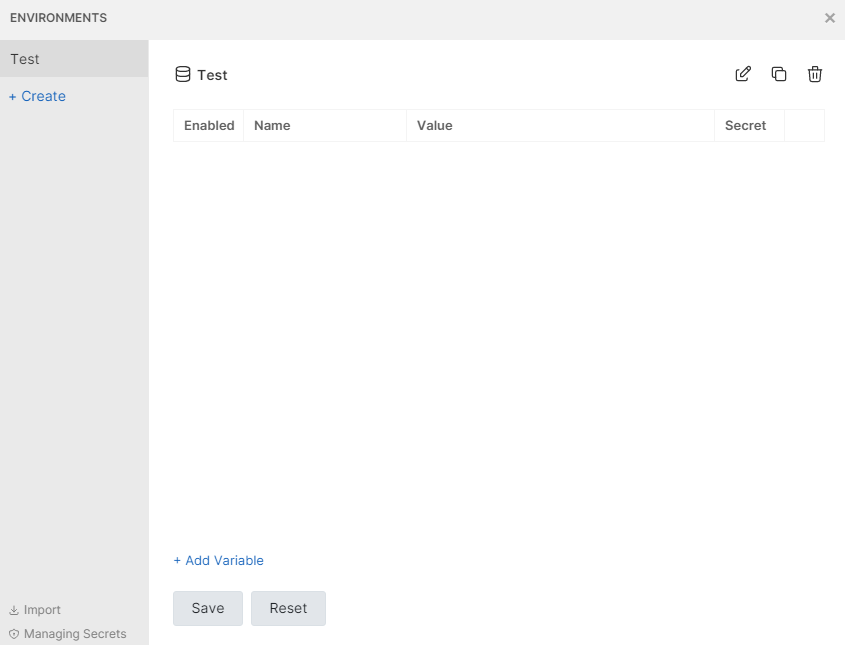
The form allows you create variable definitions that will apply to all collections that use the environment. When you specify a variable name and value, the value will be substituted for the variable name surrounded by the Bruno variable delimiter. As an example, a variable named test would be referenced in the consuming collection as {{test}}.
Collections
Collections are used to group endpoints with related functionality into a single testable element with shared configuration properties. Typically, collections will be defined by the developers of the API and provided to the tester in the form of Swagger definitions and OpenAPI specifications. If no specifications are provided by the developers, manual creation of API definitions with a collection can make testing more efficient.
Collection Creation
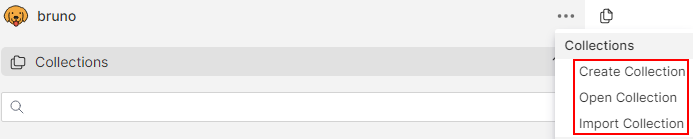
In order to create a collection, click the three dots across from the Bruno logo on the top left side of the screen. Several options are included in the menu, but the ones of immediate concern are Create Collection, Open Collection, and Import Collection.
The Create Collection option is used to manually create a collection and the endpoint definitions therein. The Open Collection option is used to open an existing Bruno collection. This can be accomplished by specifying the on-disk folder where the collection was stored. The final, and most likely option to be used for testing, is the Import Collection option. With Import Collection you can specify a local file to retrieve and import an existing OpenAPI specification.
Activation of the Import Collection option presents the following dialog.
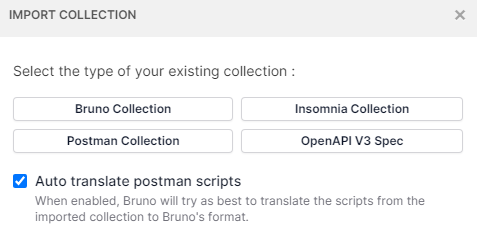 The most likely option used for setting up a testing collection is the
 OpenAPI V3 Spec. The Swagger Definitions documentation describes retrieval and manipulation of OpenAPI specifications from hosted Swagger definitions.
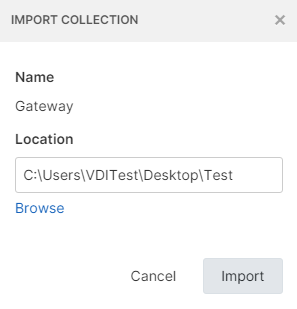
Select the targeted OpenAPI specification when prompted, then select a target folder to contain the collection, and click the Import button on the ensuing dialog.
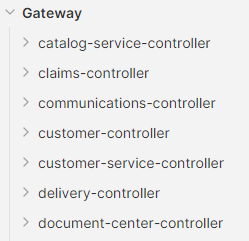
If the import is successful, the list of endpoints and methods supported by the referenced API should appear below the collection node, as shown below.
If the name included in the OpenAPI specification is not descriptive, the Rename context menu item on the collection can be used to rename the node.
Bruno OpenAPI Specification Import Limitations
Bruno does not appear to completely parse the data from the OpenAPI specification. As an example, OpenAPI specifications may include enumerations that define possible values for parameters used by API requests. The parameters are properly parsed and included in the request details for a given path, but enumeration values are not included as drop-down lists for those parameters. As a result, the tester may need to reference the OpenAPI specifications to gather a list of known good enumeration values.
Collection and Endpoint Settings
Settings applied at the collection level can be accessed using the Settings context menu item on the collection. Options exposed through collection settings are shown below. Only the most useful feature of collection settings are discussed.
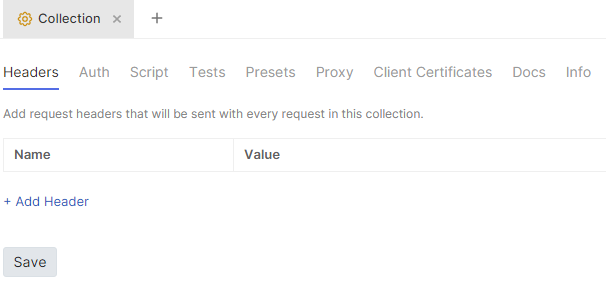
- Headers - this setting allows you to configure HTTP headers that will appear in each of the paths defined in the collection.
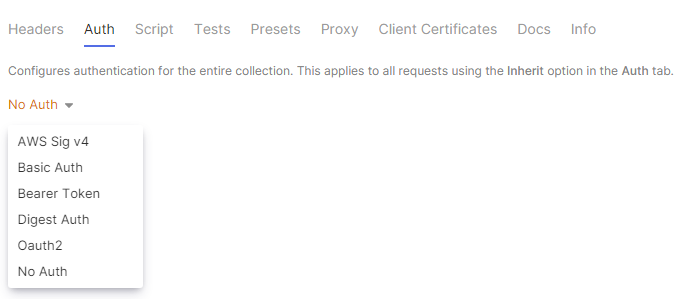
- Auth - this setting allows you to configure authentication options at the collection level. Each path can defined in the collection can then be configured to inherit authentication properties from the collection. Inheritance does not work for OAuth 2.0 authentication flows. The section titled Configuring OAuth 2.0 Authentication addresses this setup in detail.
- Script - this setting allows you to perform pre and post request actions that will be performed on all paths in the collection.
- Proxy - this setting controls the proxy setting for the collection itself. If a proxy is configured globally in Bruno, setting the proxy to enable or disabled at this level will override the global parameters.
- Client Certificates - this setting is used for client certificate authentication.
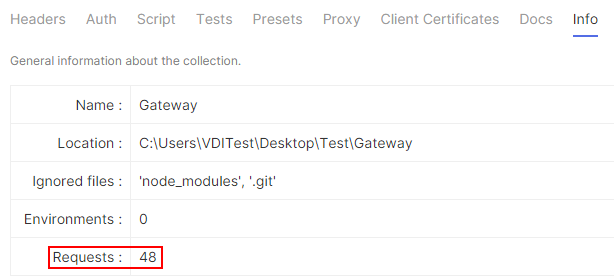
- Info - this setting displays details about the collection that may be useful in reporting. Example output illustrating the number of endpoints in the collection is shown below.
Individual API endpoints have a similar settings dialog. Settings for a given API endpoint are primarily used to set query string and request body parameters. However, the settings can also be used to override or augment settings set at the collection and environment level. For example, variables can be defined at the request level to override the value set with wider scoping (collection or environment).

Path Variable Declaration and Request Prep
Prior to sending requests to the API, it is usually required to set variables observed in the OpenAPI specification to sane values. The Swagger Definitions documentation provides a method to identify path variables that must be declared in order to formulate valid requests. Once the unique path variables are identified, the tester has several options for configuring the variables.
- Environment - The tester can create variables at the environment level. Once the variable values are set, the values will be applied to any collection configured to use the environment. Multiple collections can use the same environment, which can be convenient.
- Collection - The tester can create variables at the collection level. Once the variables are set, the values will be applied to any endpoint in the target collection.
- Endpoint - The tester can create variables at the endpoint level. Setting variables at this level is most useful for unique or exceptional conditions that must override a variable value set with a wider scope.
In practice, it appears that endpoint level variables may have some leakage. During testing, I have needed to make multiple successive requests to get the overridden value to clear on subsequently issued requests. Make sure you are paying attention to the variable values in requests to ensure that the expected values are being transmitted.
Path variables that do not have a value set will appear in red in the Bruno user interface while those that are defined appear in green. Examples are shown below.


After defining path variables, the tester must set authentication on the collection, check for required headers, and ensure that necessary request parameters are defined for each endpoint. Valid request parameters are usually included in documentation provided by the customer. The goal is to be able to generate a valid baseline request to begin testing and scanning activities from.
Configuring Authentication
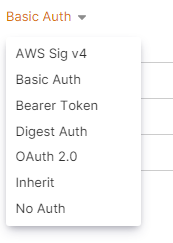
Most of the authentication options in Bruno are straightforward to configure. With each of the available options besides OAuth 2.0, a set of credentials is configured at the collection or endpoint level allowing execution of transactions using those credentials. The available Bruno authentication options are shown below.
 Notice that the list of options (taken at the endpoint level) includes the Inherit option. This allows you to specify the authentication configuration at the collection level, then configure each endpoint to inherit from the collection. Doing so allows you to quickly and easily change identities in the API without needing to reconfigure the configuration of each endpoint.
OAuth 2.0 Authentication
In Bruno OAuth 2.0 authentication configuration is slightly more complicated. Completion of the OAuth 2.0 authentication workflow typically results in issue of a token that is used on all subsequent transactions. If you configure each endpoint to perform OAuth 2.0 authentication alone, then execution of the endpoint simply results in retrieval of that token without making the desired request.
The following procedure illustrates configuration of OAuth 2.0 at the collection level so that switching identities across all API endpoints is easy to accomplish.
Use the collection context menu to access the collection settings and select the Auth tab in the Bruno user interface.
Select the OAuth2 authentication option, then select the appropriate grant type. Authorization Code is demonstrated in this walk-through. However, no matter what grant type is used, the application developers should provide all of the details to properly configure the OAuth 2.0 authentication flow.
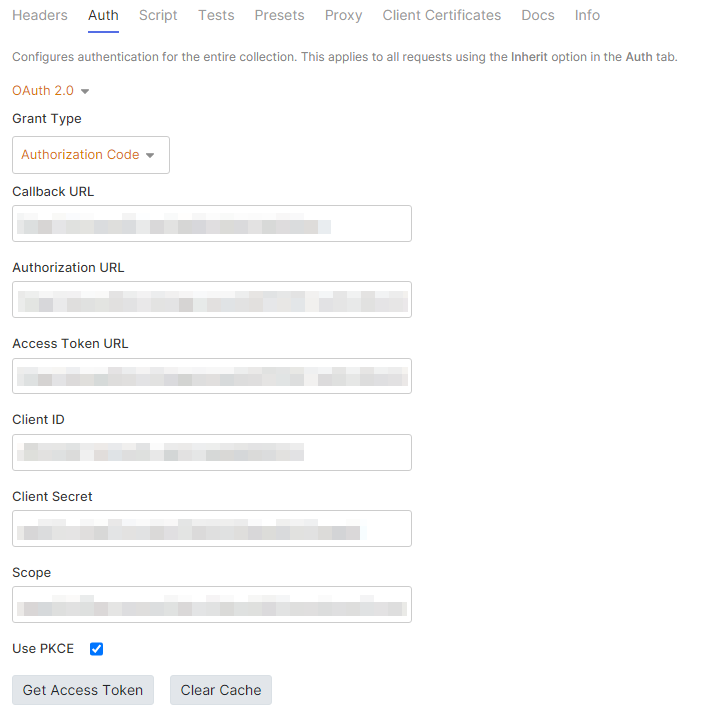
Once the appropriate values are entered into the form, click the Get Access Token button. This should result in the Bruno client presenting the OAuth 2.0 authentication form, submission of credentials, and any other requirements necessary for successful authentication with the provider. If the OAuth 2.0 flow complete properly, Bruno should indicate that a token was retrieved successfully. Once success has been achieved, click the Save button.
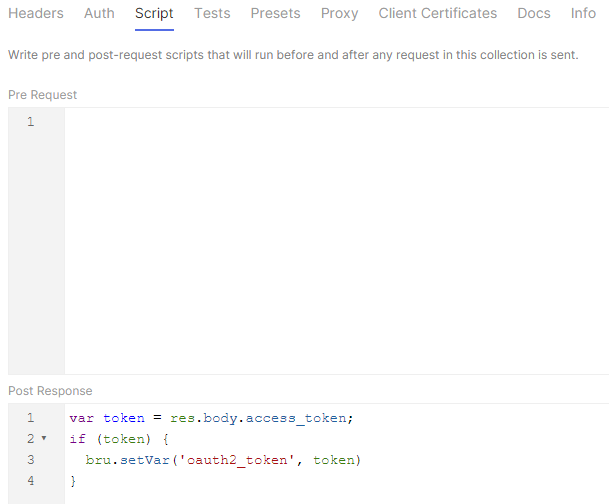
Still in the collection settings dialogue, switch to the Script tab and enter the following script snippet.
var token = res.body.access_token;
if (token) {
bru.setVar('oauth2_token', token)
}
The script above reads the access token from the response of the authentication request, checks whether the resulting variable is null, then stores the value in the oauth2_token Bruno variable.
Return to the Auth tab, click the Get Access Token button, complete the authentication workflow, and the resulting token will be stored in the oauth2_token variable. Anytime that your token expires, just navigate to collection settings, select the Auth tab, and re-accomplish authentication.
Now that the access_token is available for use through the oauth2_token variable, the collection must be configured to use the token in requests. In the collection settings dialogue, navigate to the Headers tab and create an Authorization header like the one shown below.
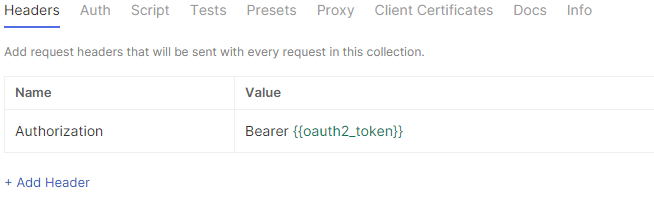 The header is used to manually build the Authorization header that would normally be sent by a browser or other client application. Notice that the Bearer keyword is included in the value in addition to the variable name used in the script, surrounded by double curly braces as a delimiter. The variable identifier is green, indicating that it has been recognized by Bruno as a valid value.
With this configuration, the Auth tab on the endpoint configurations should be set to No Auth which is the default in Bruno.
OAuth 2.0 authentication should be fully operational at this point.