Burp Suite
Intercepting HTTP Proxy for testing anything that uses HTTP
Tester References
These testers are known to be skilled with this tool.
- BBKing
- David Fletcher
- Craig Vincent
- Dan Pizarro
- Chris Traynor
- Melissa Bruno (Willing to assist with setup and provide a walkthrough of Burp Suite’s various features)
Burp Walkthrough w/ Chris Traynor
Getting Started
- Install the latest version of Burp Suite Pro from PortSwigger’s website.
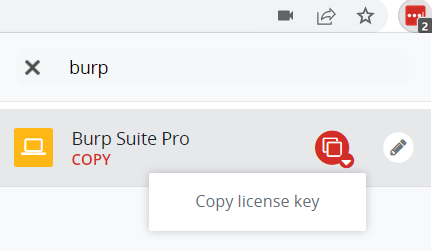
- You will be prompted for a Burp Suite Pro license during the install. To obtain a copy of BHIS’s Pro license, type “burp” into the LastPass search bar and choose “Copy license key” for the Burp Suite Pro entry. Paste the key into Burp to continue with the installation.
- Configure your browser to intercept traffic from Burp Suite by following the steps outlined here.
- Add Burp Suite’s certificate authority to your browser’s list of trusted certificates by following the steps listed here.
- PortSwigger’s Web Security Academy is an excellent training resource for developing proficiency with Burp Suite.
Procedures
- Use the BHIS custom Collaborator server: bhisco.com
- Use
ssh -D9000or similar to set up a SOCKS proxy to your DO droplet for the test.
Extensions We Like
- AuthMatrix
- JSON Web Token Attacker (aka JOSEPH)
- TurboIntruder for more Intruder-like options
- Retire.js for unpatched 3rd party components
- Logger++ for more logging of traffic so you can see what’s going on.
- Upload Scanner for testing file upload functions
- OpenAPI Parser for making template requests
- Python Scripter for writing ad hoc extensions in Python without all the complexity of a real extension
| Link | Description |
|---|---|
| LastPass | License Key under “Burp Suite Pro” |
| Installers | Sharepoint archive of installers to get started. |
| PortSwigger Academy | Free live learning labs for webapp testing (registration req’d) |
For Better Reporting
- Think about how your windows are arranged before taking a screenshot. In Repeater, maybe use top/bottom arrangement if all you need is the URL and the response. For example. Just make sure the URL is visible and that you’re focused on the parts you need to show.
- Don’t take screenshots in dark mode. They’re hard to read in a report. Use dark mode all you like, but flip to light before taking a screenshot.
General Tips
- Use the embedded browser (a Chromium thing) for a pre-configured browser.
- Or, you know, use Firefox because it’s not Chrome…
- Set “TLS Passthrough” to cover the generic Firefox Mozilla and Google and Microsoft domains to avoid those polluting your proxy history.
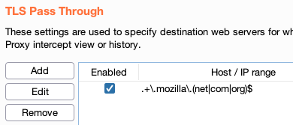
.+\.mozilla\.(com|net|org)$.+\.microsoft\.(com|net|org)$
- Proxy History is where you should be doing most of your observing.
- The target sitemap gives a great overview, but no sense of chronology. Can’t tell which requests are from the current session, for example.
- Look at the Web Sockets tab in Proxy to see if those are being used.
- Right-click on everything. Lots of Burp’s features are hidden in context menus.
- Set up multiple proxy listeners, then use multiple browser profiles, to more easily live-test privilege separation issues (and to even notice where privs are different)
Repeater
- Send to repeater, then send FROM repeater before making any changes to the request.
- This tells you if you have a valid baseline. Some requests get rejected as duplicates, you know.
- Context menu has “Paste URL as Request” which does what it sounds like to let you make a new Repeater item directly in Repeater.
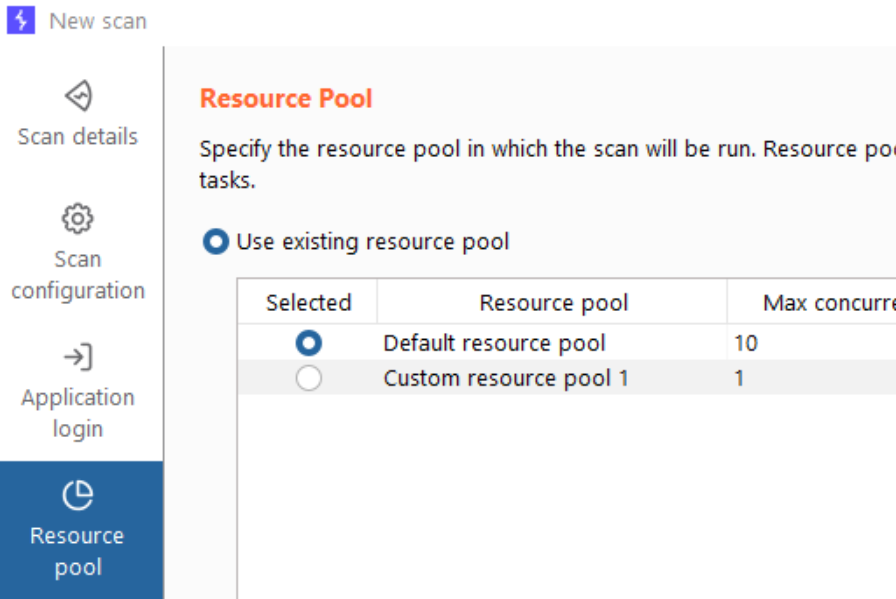
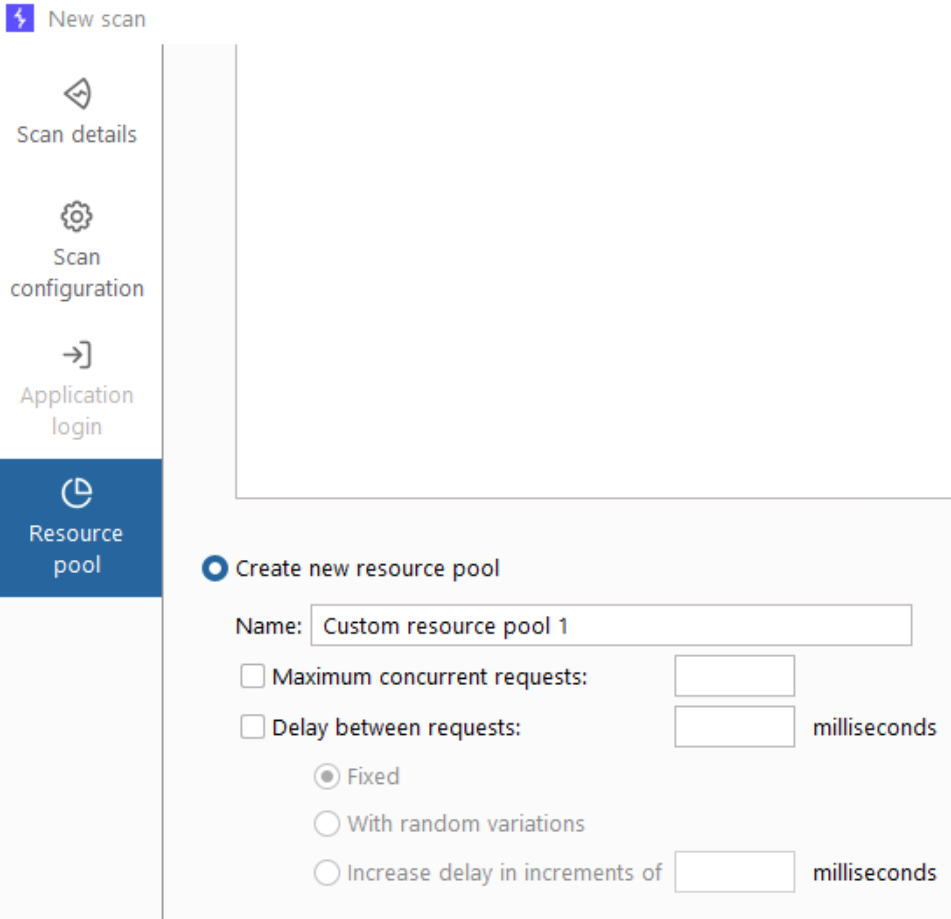
Resource Pools
The Burp Suite Intruder and Active Scanner both have the option to set Resource Pools, which determine how many requests can be made concurrently, and whether delays should be added between requests.
Delays should be added and the number of concurrent requests should be reduced any time a production application is being tested.
Intruder
- Version 2021.12.1 (released Jan, 2022) adds “multi-host intruder attacks” by allowing you to set payload positions in the hostname area of the request.
- Obivous use: brute-force discovery of subdomains.
- Portswigger’s video: https://www.youtube.com/watch?v=jBf6i_B7fTw&t=78s
- The “null payload” option is good for testing account lockouts or keeping a session alive.
- “Clear insertion points” clears whichever ones are highlighted (or all of them if there’s no highlight)
- Look at the payload processing rules.
- Enable “follow redirects (in scope)” for password spraying
Proxy Options
- Match/Replace rules
- Disable Browser XSS Protections so the target app has to handle XSS attempts without relying on the browser.
- Disable CSP Protections if they’re getting in the way of attacks. If something works only because you’ve disabled this, report it with a lower severity. CSP should be a “defense-in-depth” thing, not a primary control.
- Be careful about enabling the “don’t send out of scope requests to proxy history” - set it before you’ve explored the app and you will miss parts of the app that you should be testing. Actually, don’t set the scope at all until after you’ve explored and figured out all the servers that are serving in-scope content.

Match and Replace
- Enable these default Match and replace rules under “Proxy” > “Options” > “Match and Replace”:
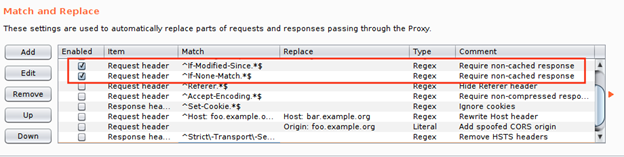
- If you disable HSTS, be sure to double-check before you add “Missing HSTS” as a finding… Banks have to have this.

- The following Match and Replace Rules are recommended for use in web application pentesting. These rules can be saved in a default Burp State file which you load before you start each test so that you always have them available.
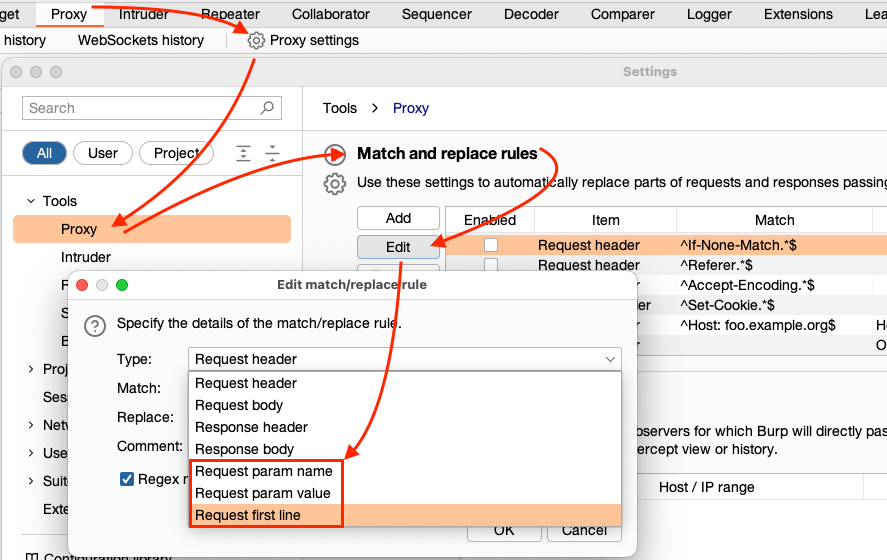
The Match and Replace rules can be configured on the Proxy⇒ Proxy settings tab.
Swapping Short Parameters
If the value of the parameter you want to swap out is not unique (e.g. CompanyCode=10&Qty=10), and the request is a GET, you can use “Request first line” as the “Type” and Burp will treat the whole “first line” (i.e. GET /q.php?CompanyCode=10&Qty=10 HTTP/1.1) as one string.
Disabled Browser Cross-Site Scripting Protection
The first rule turns off browser XSS protection. This will allow you to identify XSS vulnerabilities in the web application that would otherwise be hidden by client-side protections. It is a good security practice for a web server to instruct the browser to enable XSS protection just like it is good to use a Web Application Firewall, but the underlying vulnerability should also be corrected.

Remove Content Security Policy (CSP) Header
Content Security Policy (CSP) is another client-side protection that tells the browser to only runs scripts that are imported from a trusted location. This prevents any injected inline scripts from running. So even if you can get the server to reflect your <script>alert(1)</script> value in its response, the browser will not execute it. This is a pretty cool protection but again, it should be used as a safety net and not relied on. Also, at the time of this writing, Internet Explorer does not support the CSP header, leaving a large portion of the user population unprotected. The following rule will remove the CSP header and prevent the browser from implementing protections.