Quick Cobalt Strike Initial Use Modifications
Objective:
The Quick Cobalt Strike project, found at https://git.nopsled.me/justin.angel/infrastructure_requests, provides automation for creation of C2 server instances backed by Content Delivery Network (CDN) relays so that the C2 server is resilient against C2 detection and blacklisting. However, some configuration elements may make interaction with the C2 server processes controllable by the tester or introduce operational and OPSEC concerns.
References:
Quick Cobalt Strike Reference https://github.com/kavery/AceLdr https://git.nopsled.me/joff.thyer/payloadbuffet
Instructions
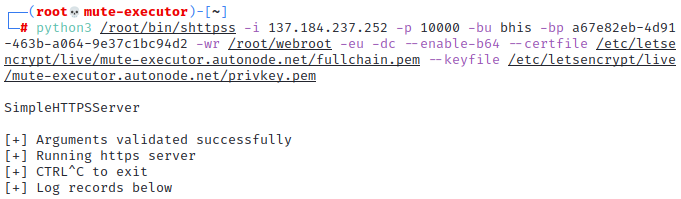
Request your Quick Cobalt Strike instance using the instructions found at https://git.nopsled.me/justin.angel/infrastructure_requests. When the instance is completed, you will be sent details about the build including the teamserver hostname and IP address, CDN fronts deployed, and Simple HTTPS Server authentication and relay details.
The following are steps that may increase usability and awareness of platform details and control.
-
Authenticate to the Quick Cobalt Strike instance via SSH.
-
Execute
ps aux | grep teamserverto identify processes associated with the teamserver instance.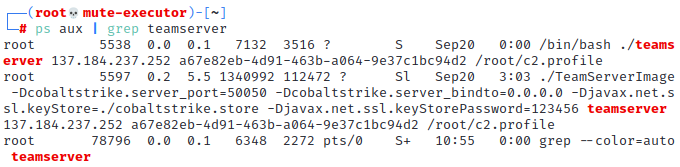 The output will include the process identifiers and the command line used to launch the teamserver instance.
 -
Kill the two processes associated with the teamserver instance using
kill [pid].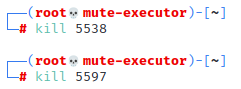 This will terminate the running teamserver instance so it can be restarted in a screen or tmux session.
 -
Copy the command line from the teamserver invocation, omitting the /bin/bash preface.

-
Start a new tmux or screen session (
screen -S teamserver) for running the teamserver instance. -
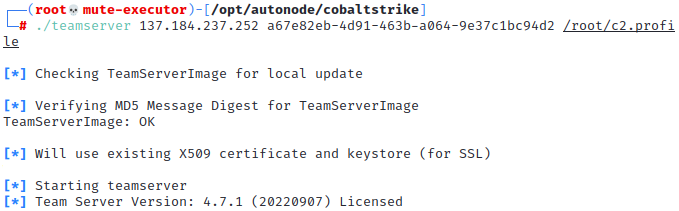
Within the screen session, change to the /opt/autonode/cobaltstrike folder and paste the command line used to launch teamserver. The teamserver instance should launch normally.
-
Exit the screen session using
CTRL A + D. -
Execute
ps aux | grep shttpssto identify processes associated with the Simple HTTPS Server instance.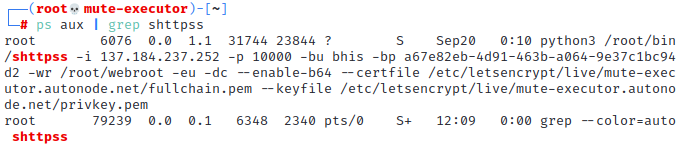 The output will include the process identifier and the command line used to launch the Simple HTTPS Server.
 -
Kill the process associated with the SHTTPS server using
kill [pid]. This will terminate the running Simple HTTPS Server instance so it can be restarted in a screen or tmux session.
 -
Start a new tmux or screen session (
screen -S shttpss) for running the Simple HTTPS Server. -
Copy the command line from the Simple HTTP Server invocation.

-
Within the screen session, paste the command line used to launch Simple HTTPS Server. Output should resemble the following.
-
Modify the malleable C2 profile using your favorite text editor (
vim /root/c2.profile)a. Change the
host_stagevalue to befalse, unless you plan to use payload staging. Typically, this is a poor OPSEC choice. b. Add thetasks_max_sizevariable to the profile and set its value to at least1572864. This will allow files larger than the default 1MB limit to be used as Beacon Object File (BOF) input.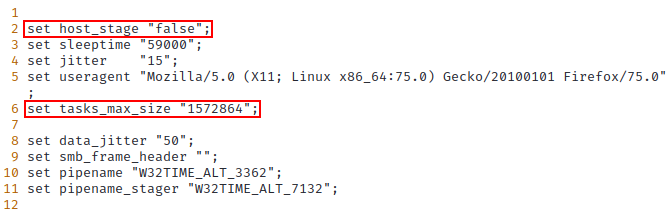 Note: The SharpHound 4.2 collector is greater than 1MB so attempting to use it with the inject-assembly or inlineExecute-Assembly BOF.
 -
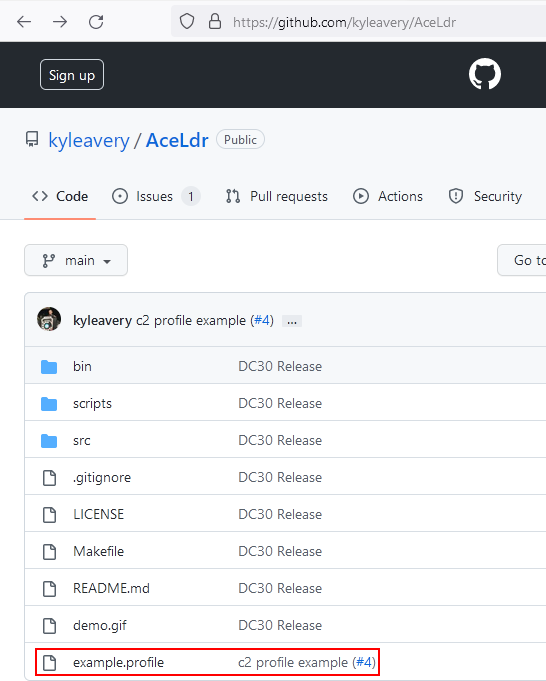
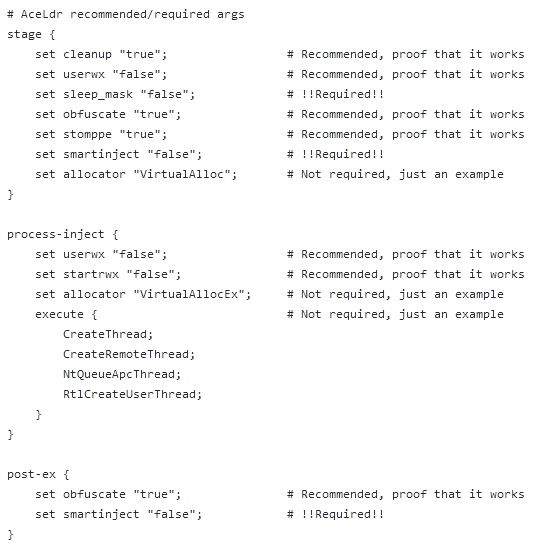
(Optional AceLdr) If you plan to use AceLdr (as of September 21, 2022), download the current release of the tool from the public repository (https://github.com/kyleavery/AceLdr) on the releases tab. Then, implement the settings outlined in “example.profile” in the same repository.

 Note: AceLdr modifications MUST be accomplished prior to shellcode generation, otherwise beacon C2 is unlikely to work reliably.
 -
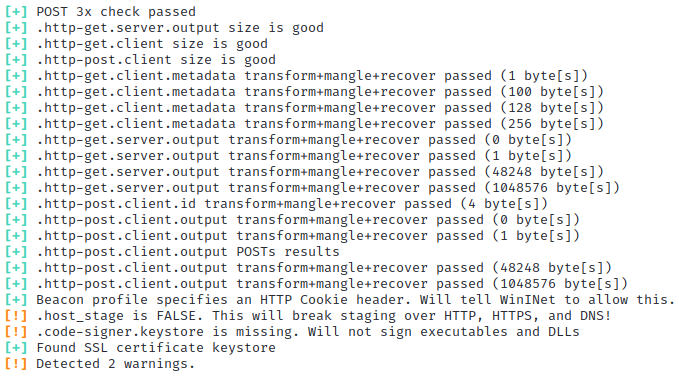
Lint the c2.profile file by changing to the /opt/autonode/cobaltstrike folder and executing the command
./c2lint /root/c2.profile.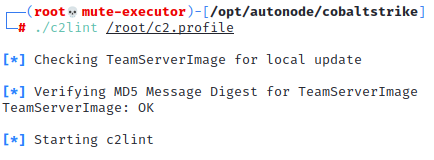 The output shown below is indicative of successful profile validation. The only warnings presented indicate that staging is disabled (intentional) and a code signing certificate is missing.
-
Reattach to the teamserver screen or tmux session and restart the server by interrupting the process with
CTRL+Cand re-executing the teamserver process. -
Launch the Cobalt Strike client UI and connect to the teamserver instance.
-
(Optional AceLdr) Open
Cobalt Strike > Script Managerin the Cobalt Strike UI. -
(Optional AceLdr) Click the Load button and select the AceLdr.cna script downloaded from GitHub in step 14.
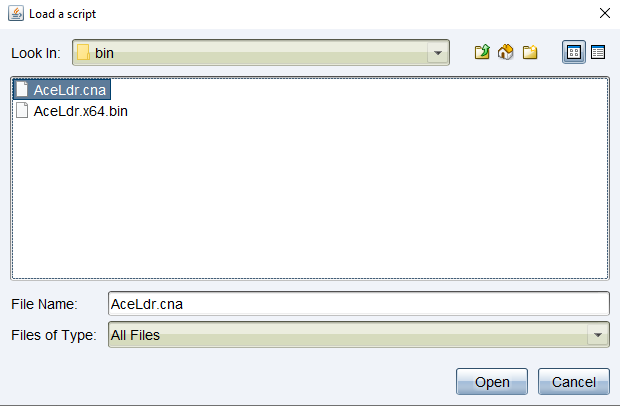 Once the aggressor script is loaded, payloads can be generated from the resulting shellcode.
 -
(Optional AceLdr) Old payloads generated during the initial build process may not work due to the AceLdr shellcode modifications. Those payloads, found in the /root/webroot/payloads folder and accessible through Simple HTTPS Server can be regenerated as described below.
a. Generate stageless shellcode using the Cobalt Strike UI by navigating to
Payloads > Windows Stageless Payloads, select your listener, change the output to raw, and click generate.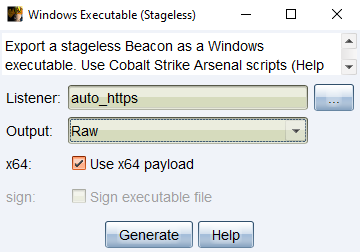 b. Upload the resulting beacon.bin file to the teamserver.
c. Remove the old payloads by executing
b. Upload the resulting beacon.bin file to the teamserver.
c. Remove the old payloads by executing rm -rf /root/webroot/payloads. d. Temporarily add the /root/bin folder to your path by executingexport PATH="/root/bin:$PATH". e. Generate new payloads by executingpython3 /root/bin/generate_scarecrow.py --raw-payload-path /root/beacon.bin --output-dir /root/webroot/payloads --scarecrow-path /root/bin/scarecrow -
Generate PayloadBuffet payloads by following the instructions at https://git.nopsled.me/joff.thyer/payloadbuffet.
-
Load additional useful scripts from the cobaltstrike-community-kit (https://https://cobalt-strike.github.io/community_kit/) via the Cobalt Strike script manger. The bash download is probably the easiest method to get the kit. Useful scripts include: - cobalt-strike/unhook-bof/unhook.cna - remove user-mode EDR hooks in beacon process - helpsystems/nanodump/NanoDump.cna - LSASS dump over beacon session - kyleavery/inject-assembly/inject-assembly.cna - In-process .NET assembly execution - harleyQu1nn/AggressorScripts/ProcessColor.cna - Colorize output from ps - harleyQu1nn/AggressorScripts/EDR.cna - EDR enumeration - outflanknl/HelpColor/HelpColor.cna - Colorize help output for OPSEC awareness - trustedsec/CS-Situational-Awareness-BOF/SA/SA.cna - Lots of useful AD situational awareness capabilities.